After installing the master page for Augusta Kentico free theme as well as the necessary files and page templates in the first part of the tutorial, we went through the steps of installing the first page, the home page. Now with all the basic necessities out of the way we should proceed to deploy few more pieces of the puzzle.
Create a Search page
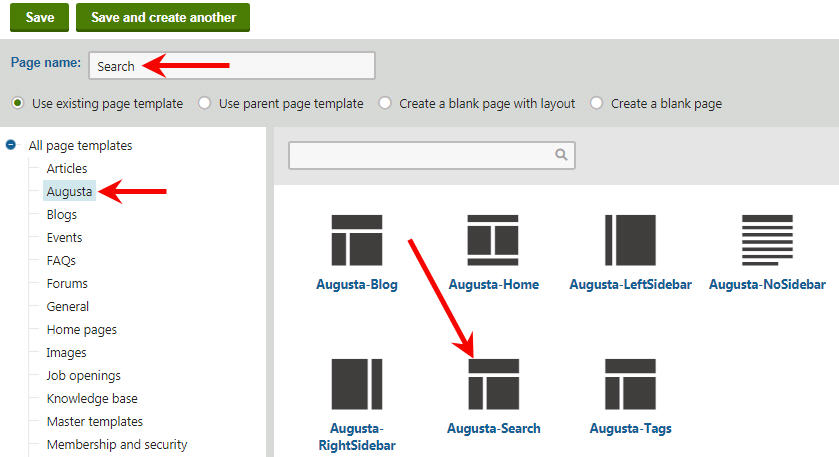
Under the main Augusta site, create a new page (Page (menu item)) and call it Search. Go to Augusta page template category and select Augusta-Search page template and Save the page.
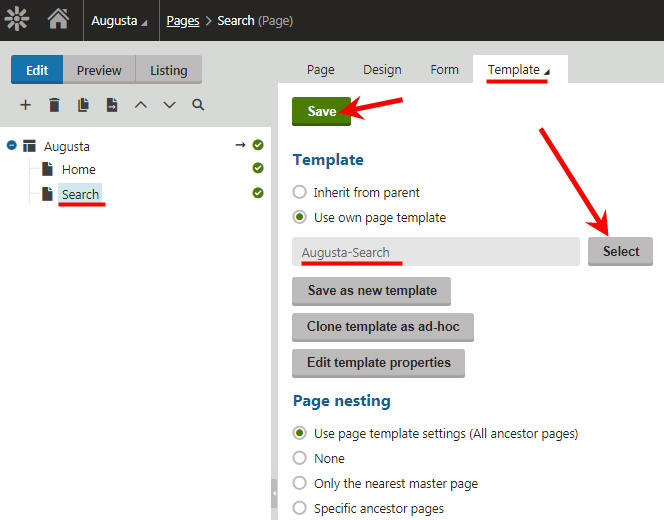
Once the Search page has been created, click on Template tab and make sure you selected the template.
Still on the Search page, click on Design tab and start adding the necessary web parts.
Start with the Breadcrumbs. On the ZoneBreadcrumbs add a Breadcrumbs web part and customize it as follows and make sure you Save & Close.
Starting path: /
HTML Envelope:
<a href="/">Home</a> > Search
Under the ZoneSideNav add a CSS list menu web part customize it the way you want and make sure you Save & Close.
Under ZoneContentTitle add a Static Text and add this code in the Content/Text area and make sure you Save & Close.
{%CurrentDocument.DocumentName@%}
Under ZoneContent we need to add two separate web parts. First, add a Smart search dialog web part and for Result webpart ID: add this text: SmartSearchResults
For the HTML Envelope Content before: add this tag: <div class=”SearchDialog”> and make sure you close the </div> tag in the Content after: Save & Close.
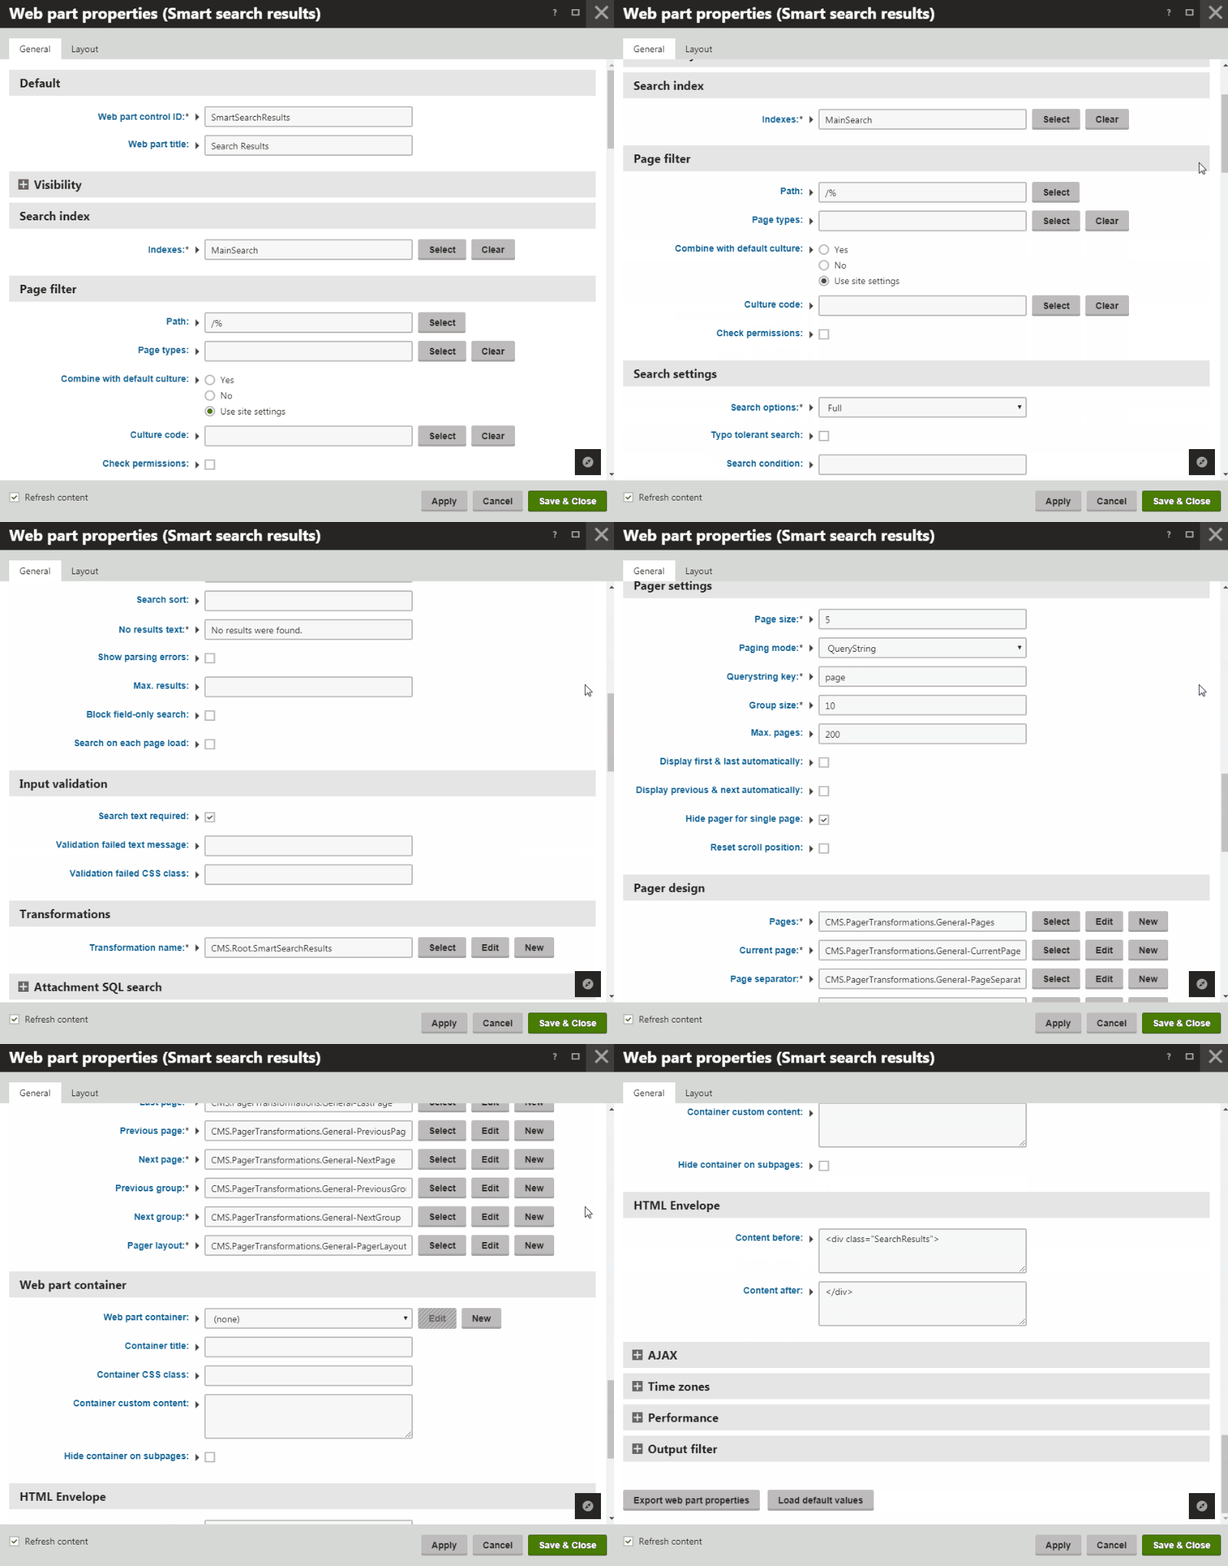
Let’s now install the second web part for ZoneContent by adding a Smart search results web part.
Very Important! Make sure you name your new Smart search result webpart: SmartSearchResults so it matches the previously created Smart search dialog web part Result webpart ID:
Select your search Index for Indexes:, Path: /% and Transformation name: CMS.Root.SmartSearchResults
For the HTML Envelope Content before: add this tag: <div class=”SearchResults”> and make sure you close the </div> tag in the Content after: Save & Close.
Search Pagination

Let’s set up the search Pagination now.
On the Search page, click on the Design page and configure the Search Results web part. Go all the way down to the Pager design section of the Smart search result web part and Edit the Pages layout:
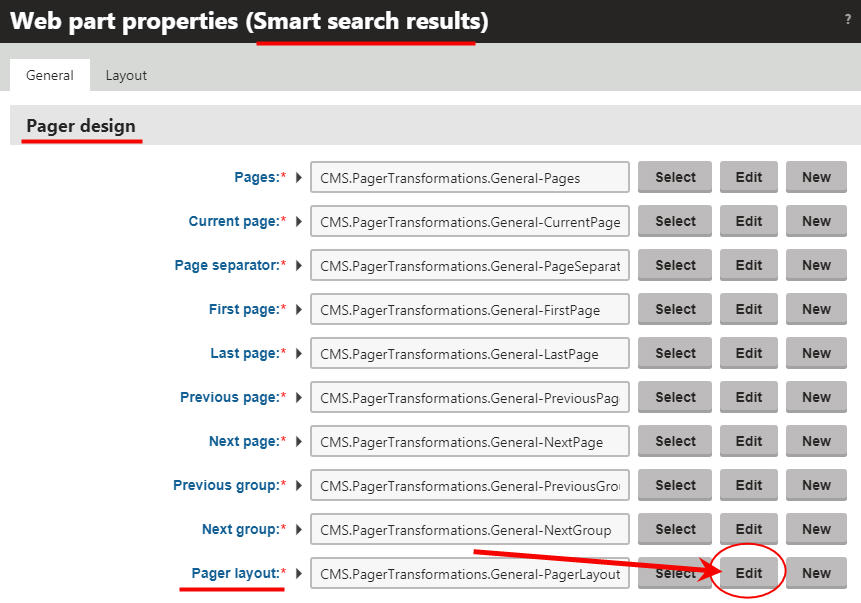
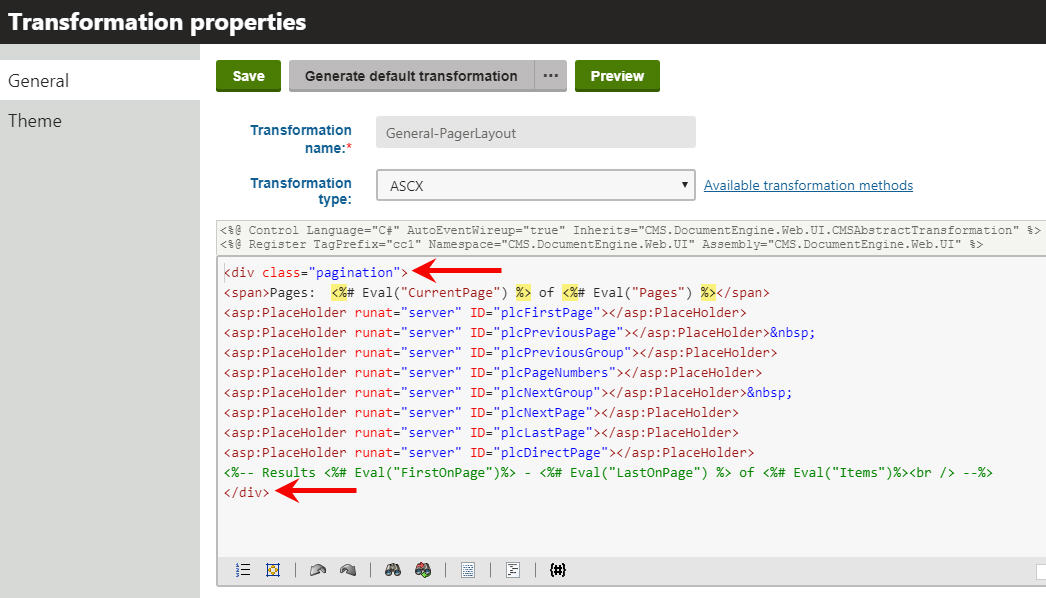
On the Transformation properties add this tag at the beginning of the code: <div class=”pagination”> and make sure you close the </div> tag at the end of the code.
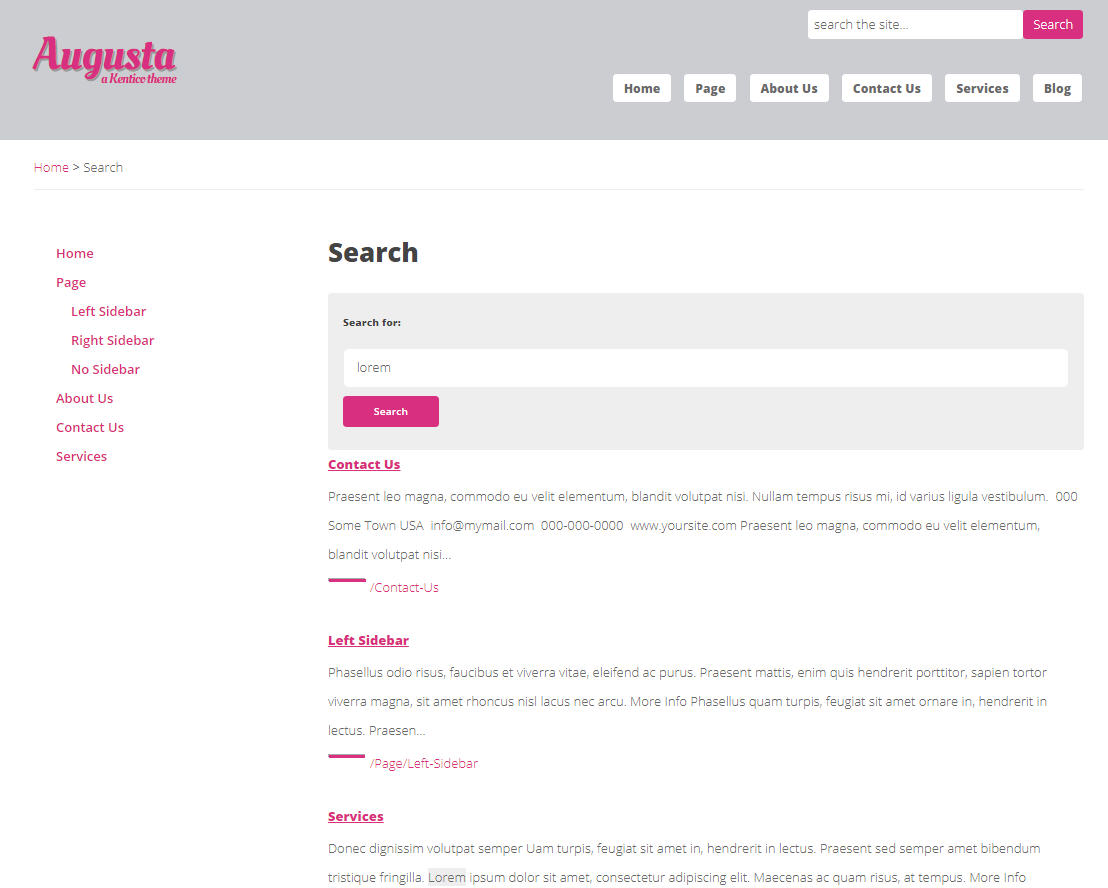
That’s all. Now, if you have your search index set up properly, you should have the search results showing like this:
On the next tutorial we will set up the Tags page.
