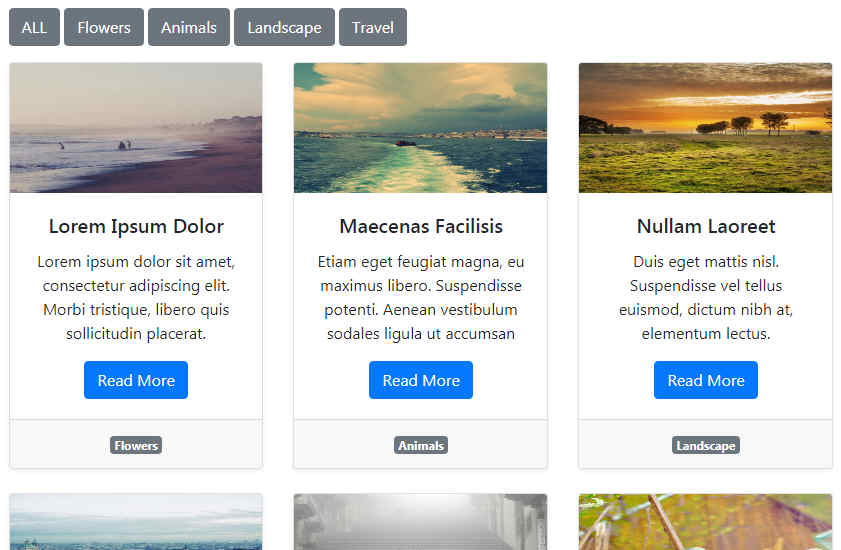
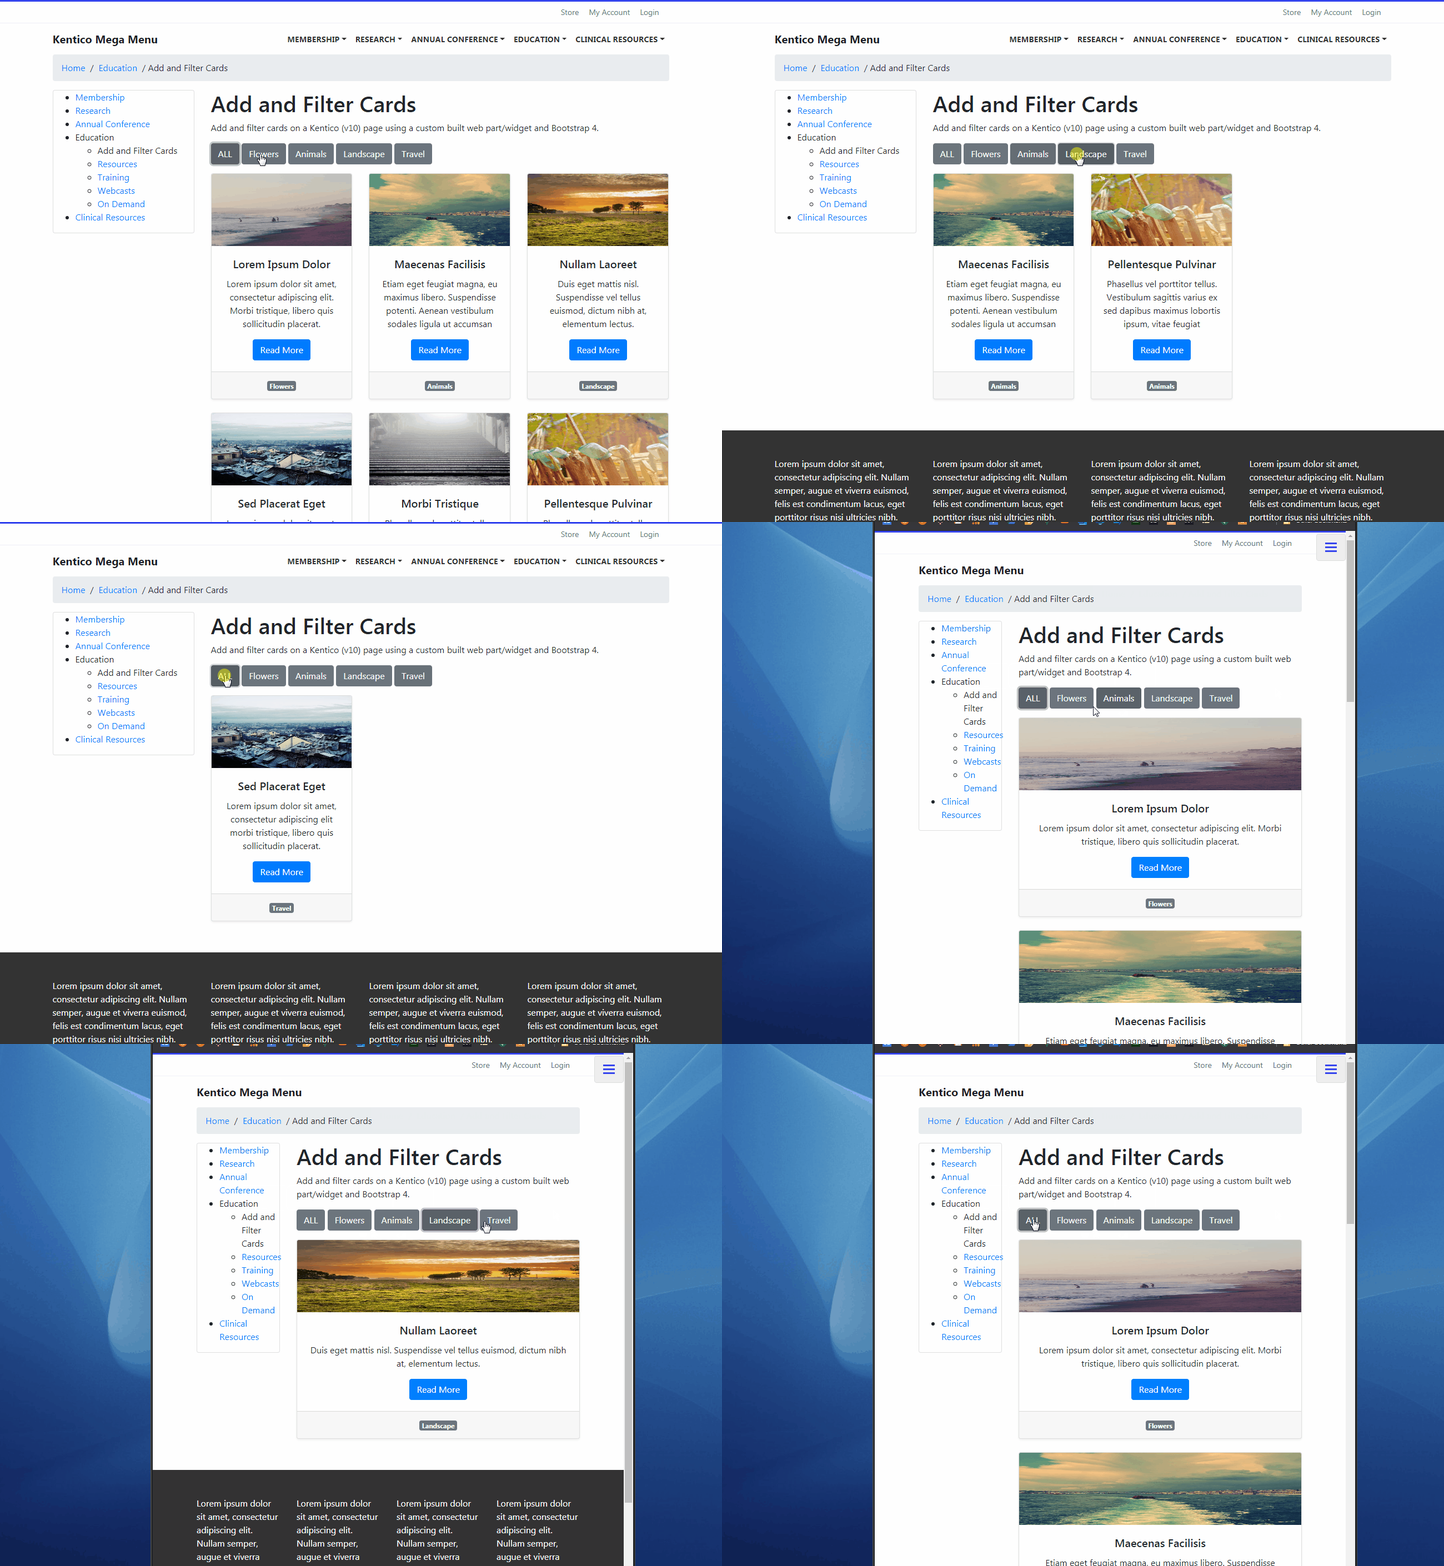
This tutorial will show you how to add and filter cards on a Kentico (v10) page using a custom built web part/widget and Bootstrap 4.
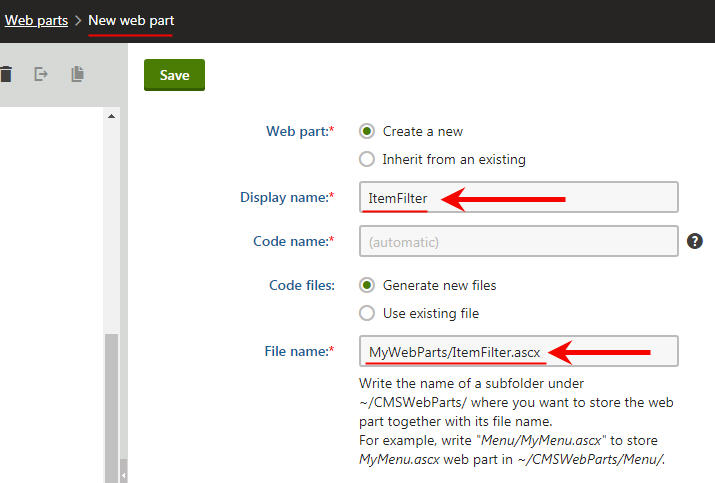
First, we need to create the custom web part, so head over to the Dashboard and select Web Parts, select your category and click New web part button.
Name your web part ItemFilter and for the File name use the MyWebParts/ItemFilter.ascx or change the MyWebParts folder to your folder where you keep all your custom web parts.
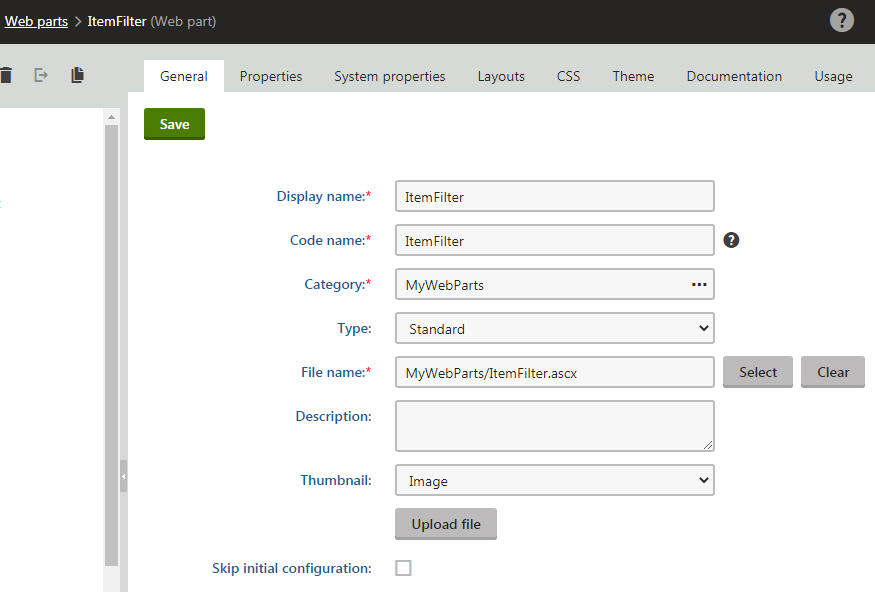
Your new web part General tab should look like this:
Next, click on the Layouts tab and then hit the New layout button. Call your new layout ItemFilter and Copy&Paste the following code:
<%@ Control Language="C#" AutoEventWireup="true" Inherits="CMSWebParts_MyWebParts_ItemFilter"  CodeFile="~/CMSWebParts/MyWebParts/ItemFilter.ascx.cs" %>
<asp:PlaceHolder runat="server">
<div class="col-lg-4 all <%= GetStringValue("ItemCategory", "") %>">
  <div class="card mb-4 shadow-sm text-center">
    <img src="<%= URLHelper.ResolveUrl( GetStringValue("ItemImage", "")) %>" class="card-img-top" style="max-height: 130px;" alt="<%= GetStringValue("ItemTitle", "") %>">
    <div class="card-body">
      <h5 class="card-title"><%= GetStringValue("ItemTitle", "") %></h5>
      <p class="card-text"><%= GetStringValue("ItemDescription", "") %></p>
      <a href="<%= GetStringValue("ItemUrl", "") %>" class="btn btn-primary">Read More</a>
    </div>
    <div class="card-footer"><span class="badge badge-secondary"><%= GetStringValue("ItemCategory", "") %></span></div>
  </div>
</div>
</asp:PlaceHolder>
Now, let’s create a widget so editors can easily use the web part we just created. Head back to the Dashboard and select Widgets, select your container and click New widget button. Look for ItemFilter web part you just created and hit Save & Close button.
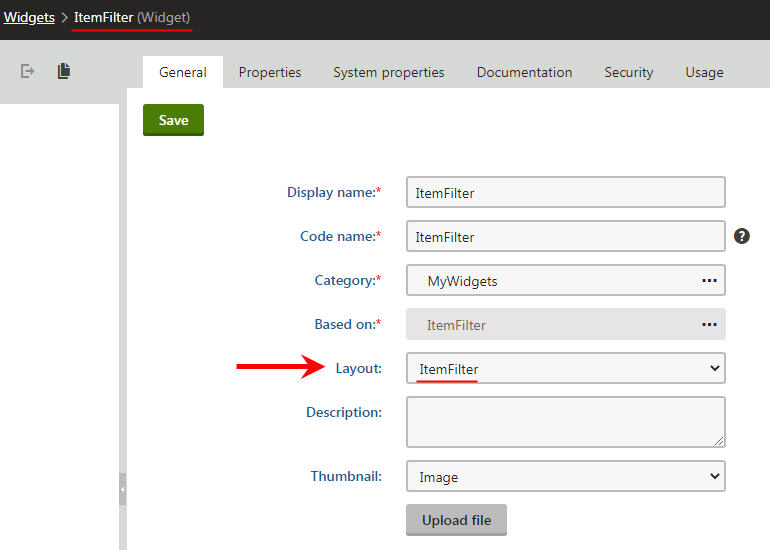
On the next screen, for the Layout select ItemFilter from dropdown selection and hit Save.
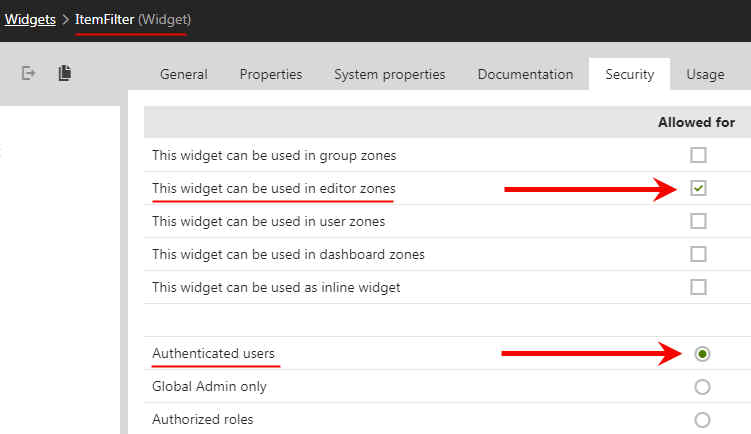
Next, click on Security tab and make sure you select these tow options: This widget can be used in editor zones and Authenticated users.
Next, click on Properties tab and let’s create the necessary fields for this widget.
ItemTitle – Data type: Text
ItemDescription – Data type: Long text
ItemCategory – Data type: Text, Form control: Drop-down list, Data source: Your Categories as list (Flowers, Animals, Landscape, Travel). Make sure you remember the categories when you build the page template.
ItemImage – Data type: Text, Form control: URL selector
ItemUrl – Data type: Text, Form control: URL selector
Hit Save, to save the new widget.
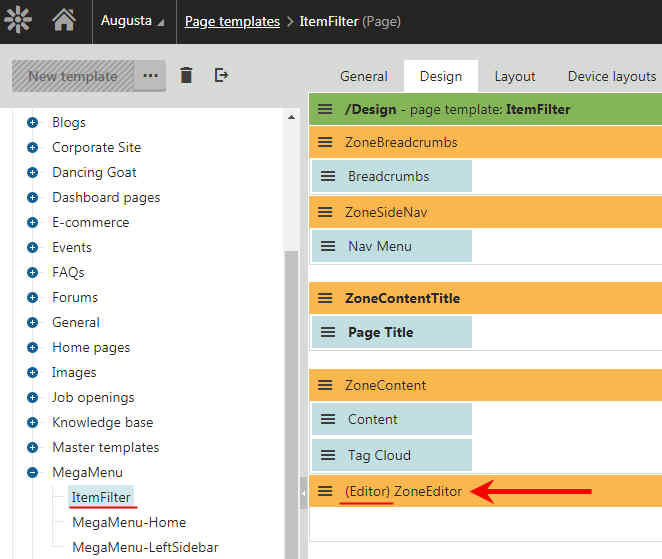
Now, let’s create a custom page template. So, head over to Dashboard and select Page templates. Under your desired page template category create a new page template and call it ItemFilter and hit Save.
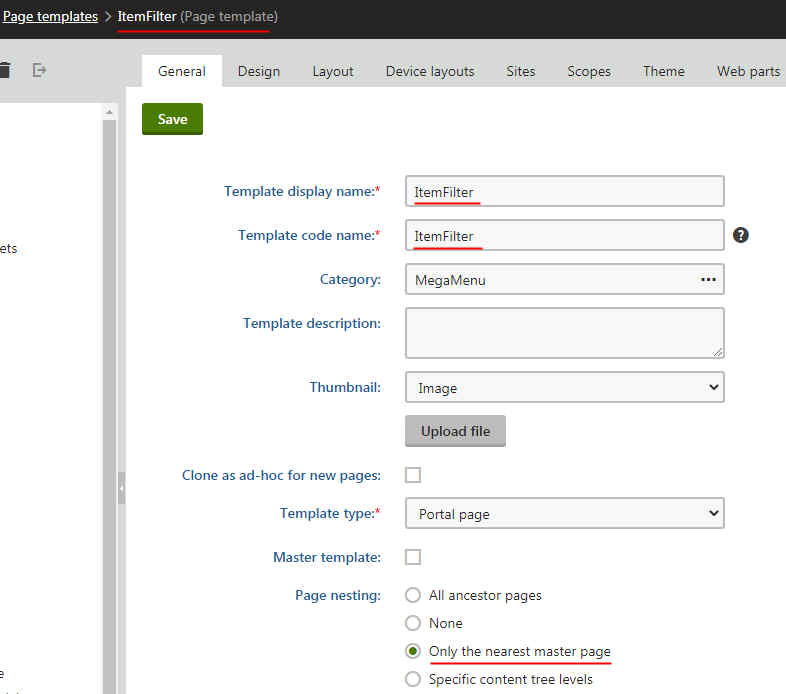
Click on the Layout tab and Copy&Paste this code, or use your own page template. For this purpose I use the MegaMenu Bootstrap Template.
<main role="main">
<div class="container">
  <div class="row">
    <div class="col-lg-12">
      <nav aria-label="breadcrumb">
        <div class="breadcrumb"><cms:CMSWebPartZone ZoneID="ZoneBreadcrumbs" runat="server" /></div>
      </nav>
    </div>
  </div>
  <div class="row">
    <div class="col-md-3">
      <div class="card">
        <div class="nav flex-column nav-pills" id="v-pills-tab" role="tablist" aria-orientation="vertical">
          <cms:CMSWebPartZone ZoneID="ZoneSideNav" runat="server" />
        </div>
      </div>
    </div>
    <div class="col-md-9">
      <h1><cms:CMSWebPartZone ZoneID="ZoneContentTitle" runat="server" /></h1>
      <div class="row">
        <div class="col-lg-12 mb-3">
          <cms:CMSWebPartZone ZoneID="ZoneContent" runat="server" />
        </div>
      </div>
      <div class="row">
        <div class="col-lg-12 mb-3">
          <button type="button" class="btn btn btn-secondary category-button" data-filter="all">ALL</button>
          <button type="button" class="btn btn btn-secondary category-button" data-filter="Flowers">Flowers</button>
          <button type="button" class="btn btn btn-secondary category-button" data-filter="Animals">Animals</button>
          <button type="button" class="btn btn btn-secondary category-button" data-filter="Landscape">Landscape</button>
          <button type="button" class="btn btn btn-secondary category-button" data-filter="Travel">Travel</button>
        </div>
      </div>
      <div class="row mb-3">
        <cms:CMSWebPartZone ZoneID="ZoneEditor" runat="server" />
      </div>
    </div>
  </div>
</div>
</main>

<script>
$(document).ready(function(){
	$(".category-button").click(function(){
	var filterValue = $(this).attr('data-filter');
	if(filterValue == "all")
		{
		$(".all").show("slow");
		}
	else
		{
		$(".all").not('.'+filterValue).hide("slow");
		$(".all").filter('.'+filterValue).show("slow");
		}
	});
});
</script>
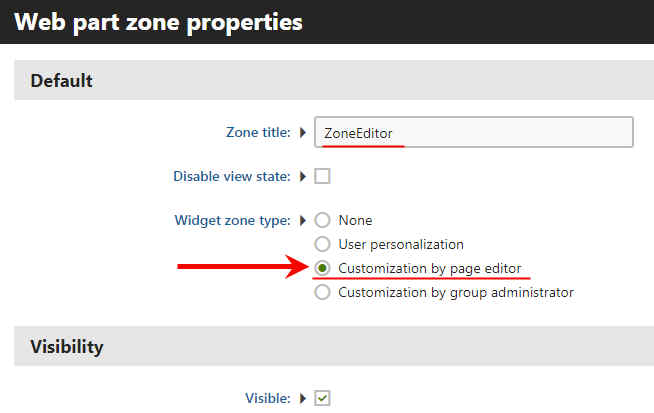
For the ZoneEditor make sure sure you change the Widget zone type to Customization by page editor so editors can add widgets.
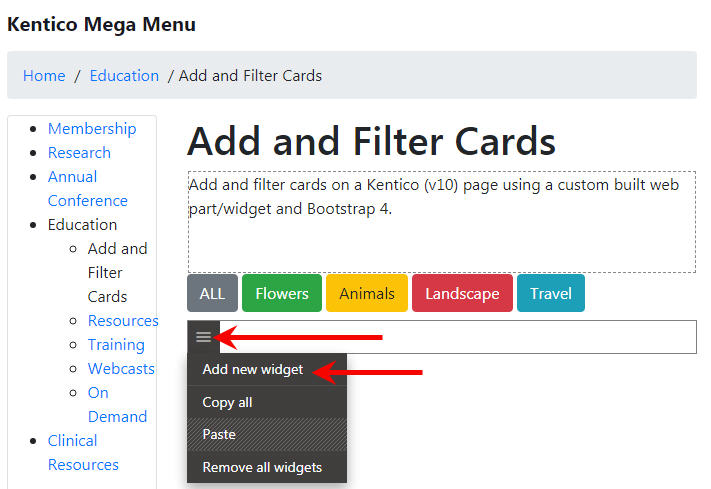
Now, go to your site and create a new page based on the new ItemFilter page template. On the Page tab click on the widget zone menu and select Add new widget.
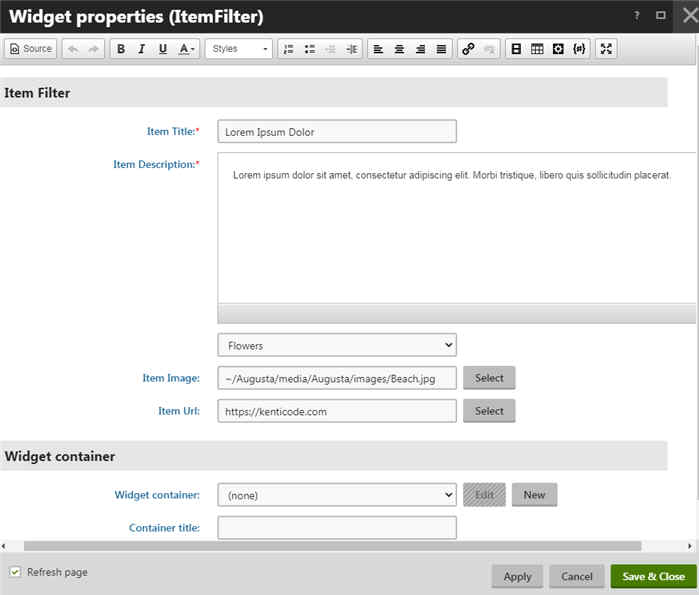
Look for your new ItemFilter widget and insert it. On the widget form fill out all the necessary fields and hit Save & Close. Repeat the steps to create new cards.
Now you have a beautiful page that displays cards and able to filter the cards based on categories.
