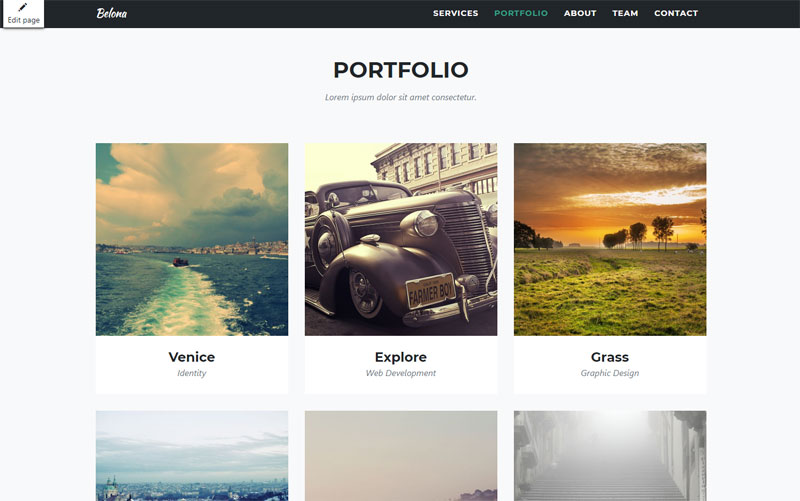
In the previous tutorial we learned how to create the necessary Kentico custom web parts and now that we have the web parts done we can create the widgets which will allow our editors to easily add content to the One Page Belona template.
Create the Widgets
Open the Widgets application and create a new widget category called Belona that will hold all your widgets for Belona theme.
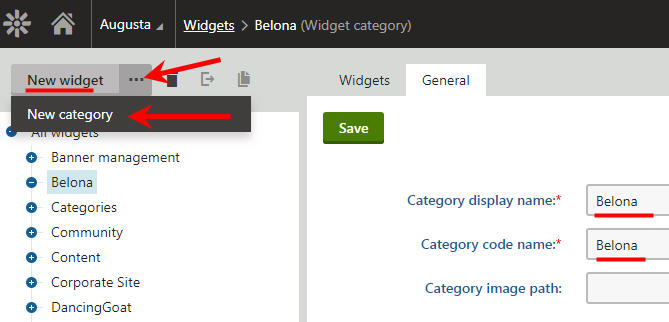
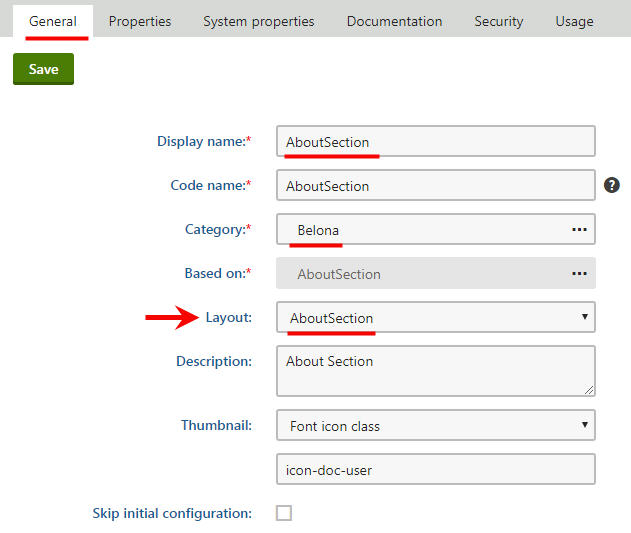
Under the new Belona widget category, click the New widget to create your About Section widget and call it AboutSection. Once created go back to the General tab and make sure you have the same setup:
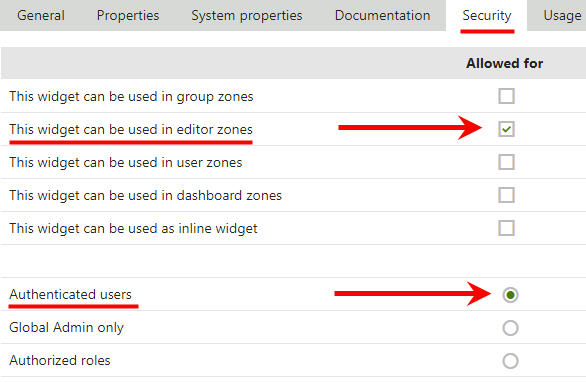
Next, click the Security tab and make sure you select “This widget can be used in editor zones” and check “Authenticated users“.
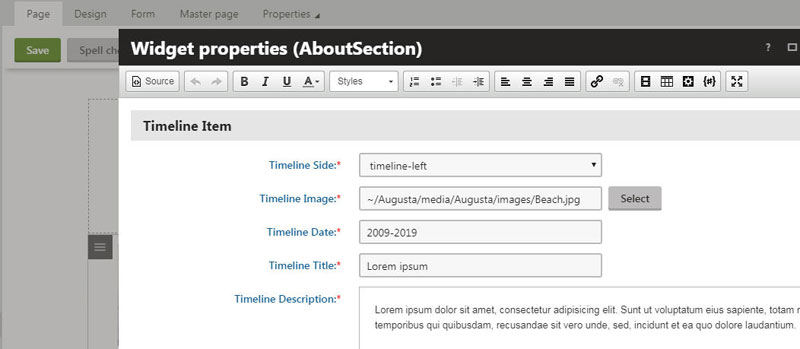
Next, click on the Properties tab and add the following properties:
TimelineSide
Data type: Text
Required: true
Field caption: Timeline Side
Form control: Drop-down list
Data source: List of options: timeline-left and timeline-right
TimelineImage
Data type: Text
Required: true
Field caption: Timeline Image
Form control: URL selector
TimelineDate
Data type: Text
Required: true
Field caption: Timeline Date
Form control: Text box
TimelineTitle
Data type: Text
Required: true
Field caption: Timeline Title
Form control: Text box
TimelineDescription
Data type: Long text
Required: true
Field caption: Timeline Description
Form control: Rich text editor
Next, create the PortfolioSection widget.
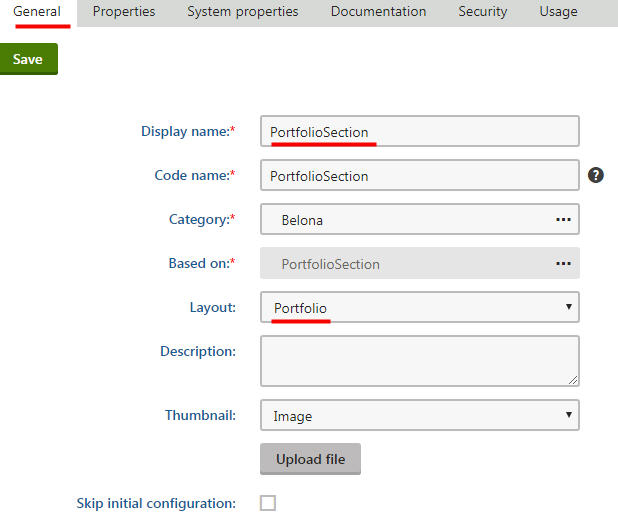
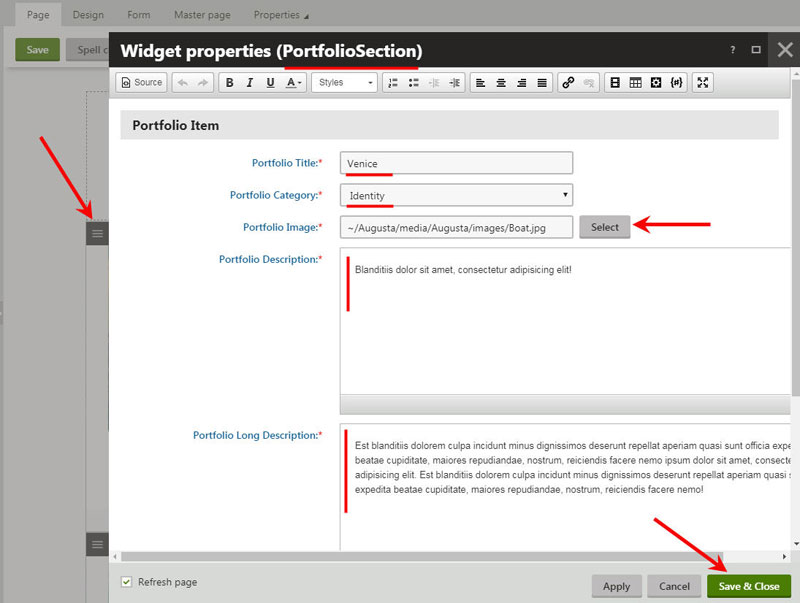
Follow the same steps as the above widget and when you get to the Properties part add the following properties:
PortfolioTitle
Data type: Text
Required: true
Field caption: Portfolio Title
Form control: Text box
PortfolioCategory
Data type: Text
Required: true
Field caption: Portfolio Category
Form control: Drop-down list
Data source: List of options: Web Design, Web Development, Graphic Design, Identity
PortfolioImage
Data type: Text
Required: true
Field caption: Portfolio Image
Form control: URL selector
PortfolioDesc
Data type: Long text
Required: true
Field caption: Portfolio Description
Form control: Rich text editor
PortfolioLongDesc
Data type: Long text
Required: true
Field caption: Portfolio Long Description
Form control: Rich text editor
PortfolioDate
Data type: Date
Required: true
Field caption: Portfolio Date
Form control: Calendar
Next, create the ServicesSection widget.
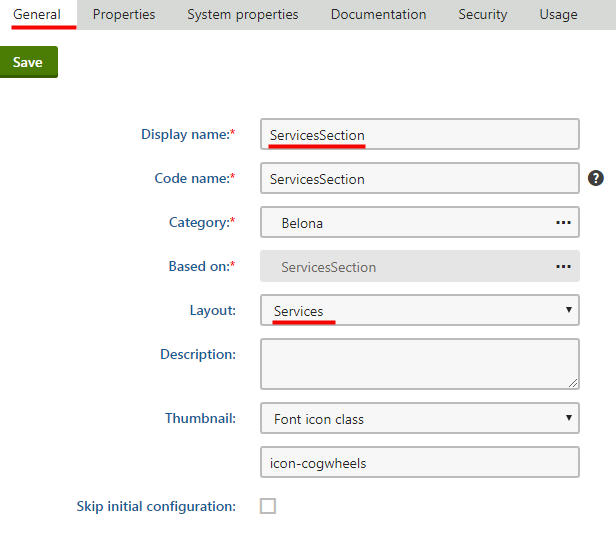
Follow the same steps as the above widgets and when you get to the Properties part add the following properties:
ServicesSection
Data type: Text
Required: true
Field caption: Services Section
Form control: Drop-down list
Data source: List of options: fa-shopping-cart, fa-laptop, fa-lock, fa-code
SectionTitle
Data type: Text
Required: true
Field caption: Section Title
Form control: Text box
SectionInfo
Data type: Long text
Required: true
Field caption: Section Info
Form control: Rich text editor
And finally, create the TeamSection widget.
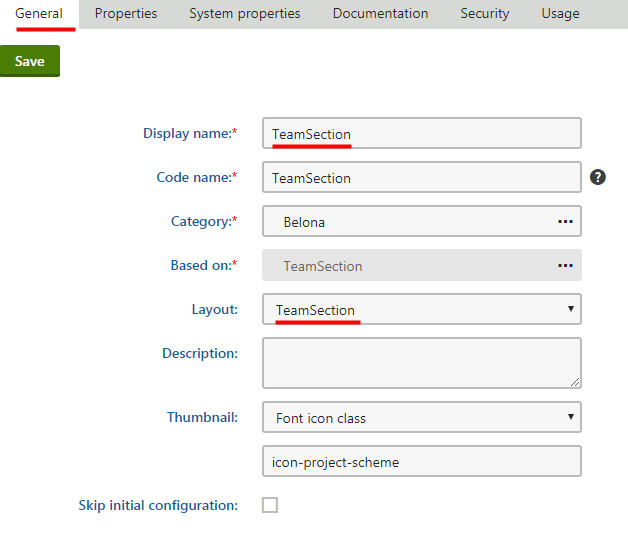
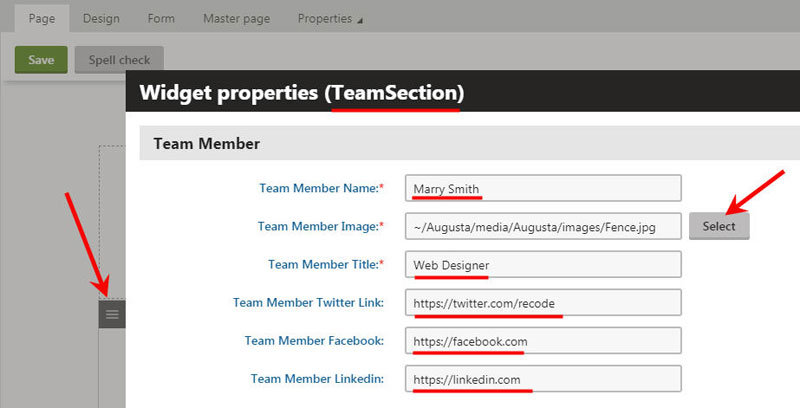
Follow the same steps as the above widgets and when you get to the Properties part add the following properties:
TeamMemberName
Data type: Text
Required: true
Field caption: Team Member Name
Form control: Text box
TeamMemberImage
Data type: Text
Required: true
Field caption: Team Member Image
Form control: URL selector
TeamMemberTitle
Data type: Text
Required: true
Field caption: Team Member Title
Form control: Text box
TeamMemberTwitter
Data type: Text
Required: false
Field caption: Team Member Twitter Link
Form control: Text box
TeamMemberFacebook
Data type: Text
Required: false
Field caption: Team Member Facebook
Form control: Text box
TeamMemberLinkedin
Data type: Text
Required: false
Field caption: Team Member Linkedin
Form control: Text box
Now that all the widgets are created it time to add some content on the page.
So, head over to your page that uses Belona One Page theme and make sure you’re under Page tab. Click the first widget zone under Services section and add the ServiceSection widget. Fill out all the necessary fields and hit Save & Close. Do the same for the rest of the widget zones under Services section.
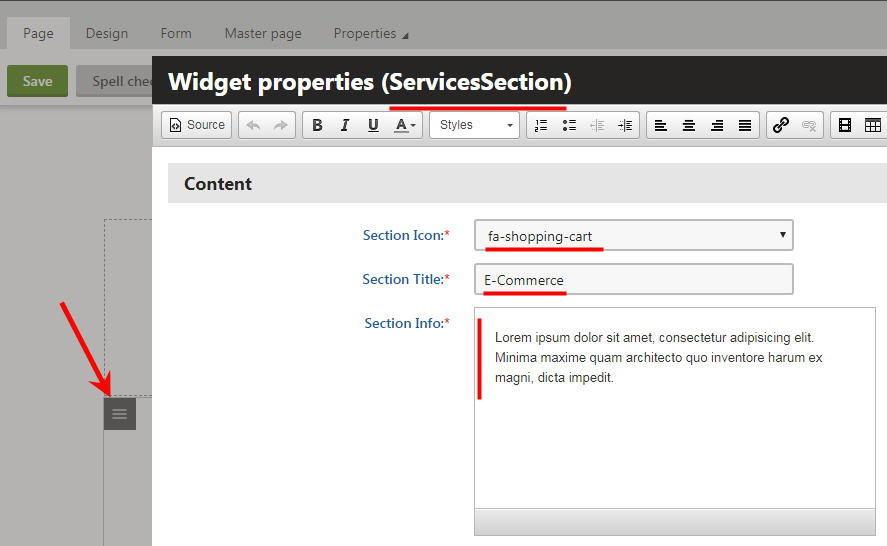
Next, move down to Portfolio section and click on the widget zone to add PortfolioSection widget. Fill out all the necessary fields and hit Save & Close. Do the same for the rest of the widget zones under Portfolio section.
Next, move down to About section and click on the widget zone to add AboutSection widget. Fill out all the necessary fields and hit Save & Close. Do the same for the rest of the widget zones under About section.
And finally, move down to Team section and click on the widget zone to add AboutSection widget. Fill out all the necessary fields and hit Save & Close. Do the same for the rest of the widget zones under Team section.
Contact Form
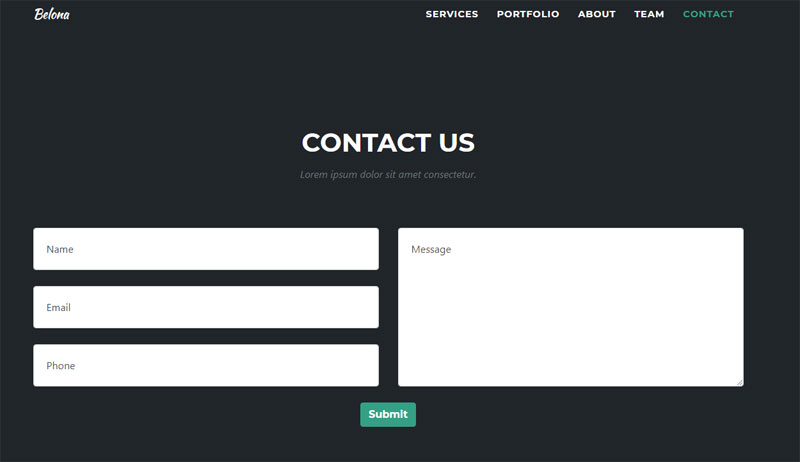
To create the Contact form for the page go to Forms application and create a new form called Belona Contact and add the following Fields:
Name
Data type: Text
Required: true
Field caption: Name
Form control: Text box
Email
Data type: Text
Required: true
Field caption: Email
Form control: Text box
Phone
Data type: Text
Required: true
Field caption: Phone
Form control: Text box
Message
Data type: Text
Required: true
Field caption: Message
Form control: Text area
Now that the Fields are created head over to Layout and check the option to Use custom form layout and make sure HTML is selected. Click the Source button to get to the HTML source code of the editor, Copy&Paste the following code and Save:
<div class="row"> <div class="col-md-6"> <div class="form-group">$$input:Name$$</div> <div class="form-group">$$input:Email$$</div> <div class="form-group">$$input:Phone$$</div> </div> <div class="col-md-6"> <div class="form-group">$$input:Message$$</div> </div> <div class="clearfix"> </div> <div class="col-lg-12 text-center">$$submitbutton$$</div> </div>
Go back to your page that uses Belona One Page theme and navigate all the way down to the Contact Us section.
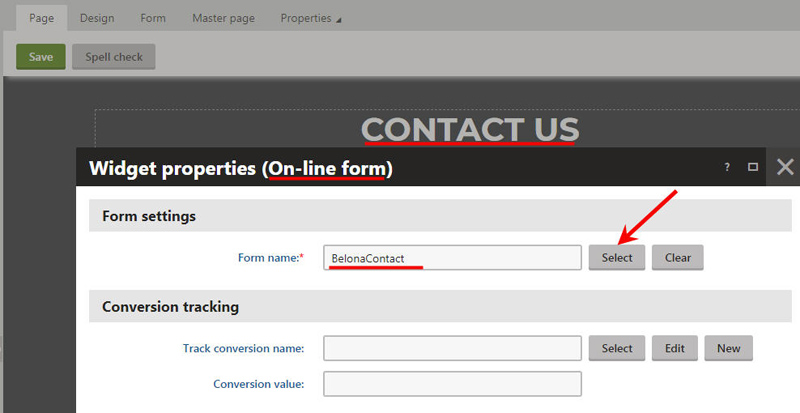
Click the editable text container under Contact Us section to get the HTML editor toolbar set and click the small gear icon that says “Insert/Edit widget” and add an On-Line form widget.

On the On-Line form widget click Select button to look for your Contact form you just created, select it and then Save & Close.
All other editable text containers not cover here (hero, section titles, footer) and available on the theme are just simple zones where your editors can add their own text at will.
That’s all folks! I hope you gained some knowledge on branding Kentico sites. Feel free to leave us a comment.
